
Click on images to enlarge.
Four selvedge warping is a method to set up your loom so that when you finish weaving you do not have warp ends that need to be sewn back or sewn in. The warp is a continuous loop with only a beginning knot and an end knot. The weaving sequence is over two warps, under two warps, etc. The standard four selvedge warping method requires needle weaving the last passes, an arduous task. The method described below eliminates needle weaving.
Almost all ancient cultures used some form of four selvedge weaving. Some Andean cultures wove using two differently colored warps as one , but the significance of this practice is not known. In these tapestries, the four selvedge warping method is standard, and thus required the last passes to be needle woven.
The method uses three warps linked together. The top warp enables the creation of a shed, which allows you to weave to the top of the middle warp (the warp for the tapestry) thus eliminating the final needle weaving. The bottom warp is simply a wrapping that holds the middle warp in place against the bottom beam. This method is particularly useful when weaving small tapestries because it eliminates the bulk of warp ends that are sewn to the back or into the weaving. With much practice and creativity, the middle warp can be manipulated in different ways, including multi-selvedge shapes.
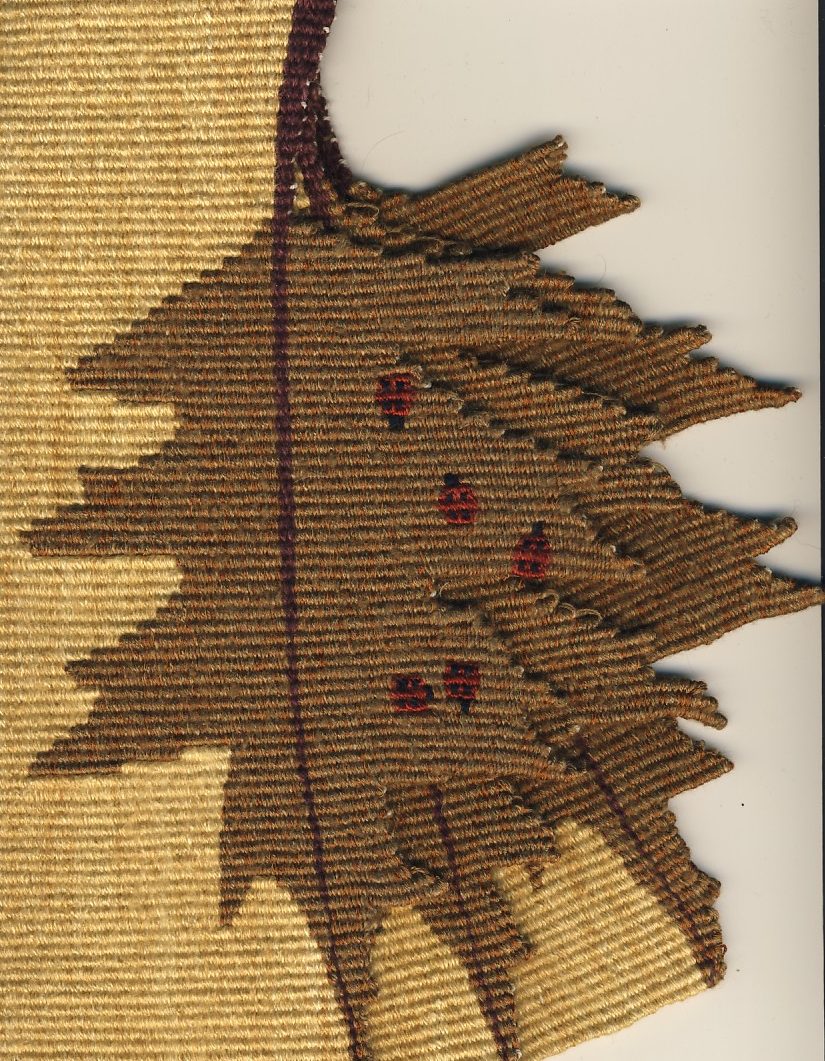
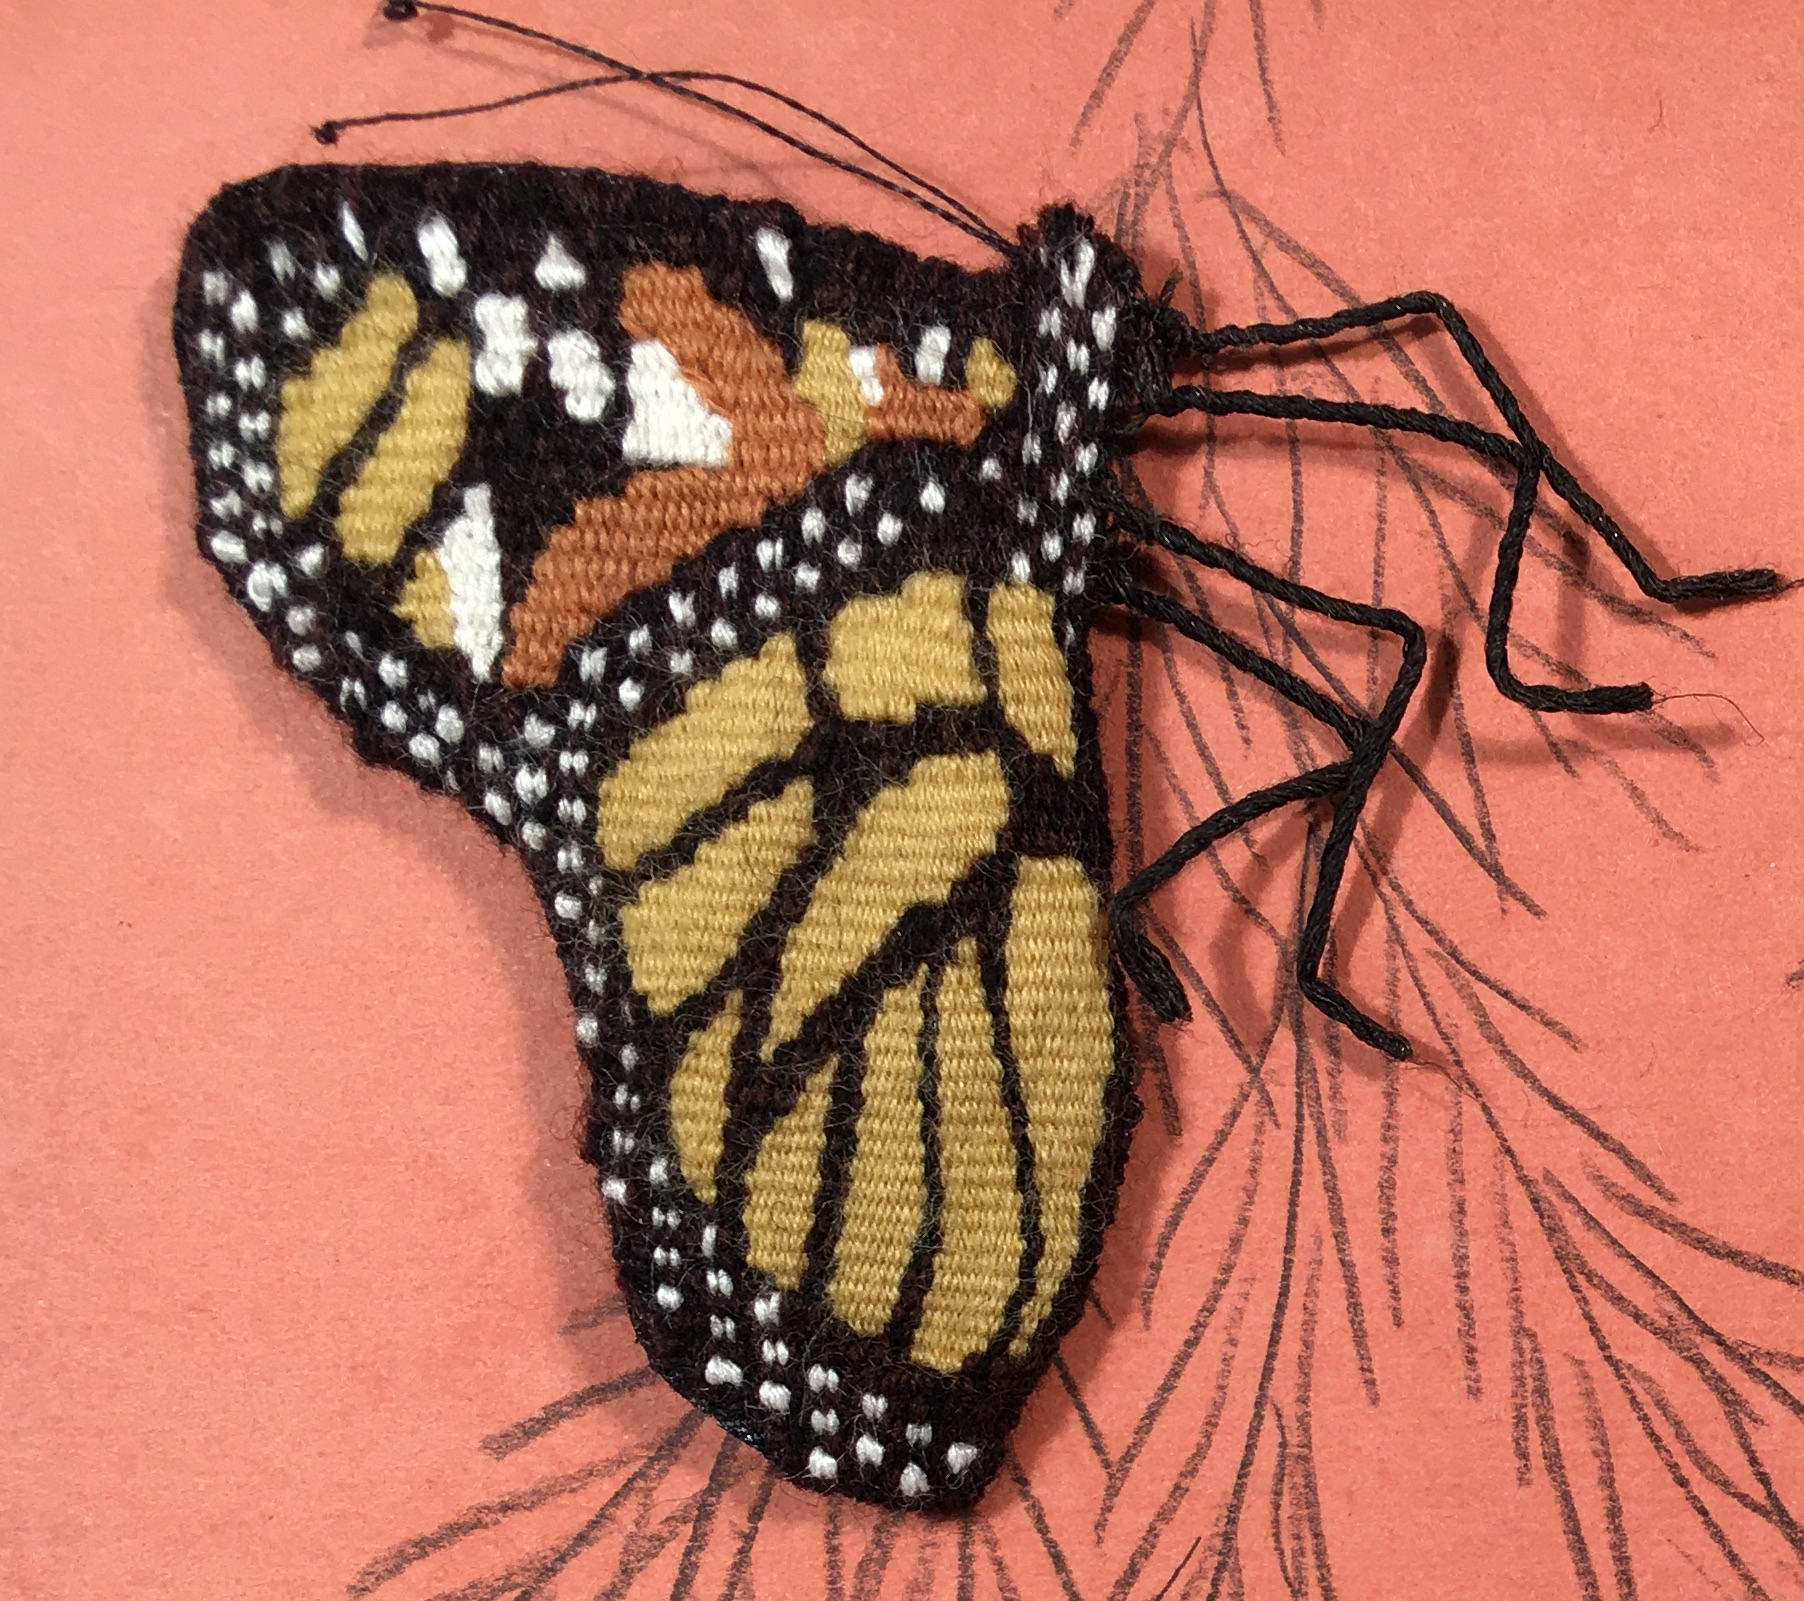
(left) Three multi- selvedge oak leaves (from “Pandora Box – 9 Spot Lady Bug”), 12″ x 6″ each. (right) Multi-selvedge shaped monarch butterfly (from “Pandora Box – Monarch Butterfly”), c. 3” x 2.5”
How To
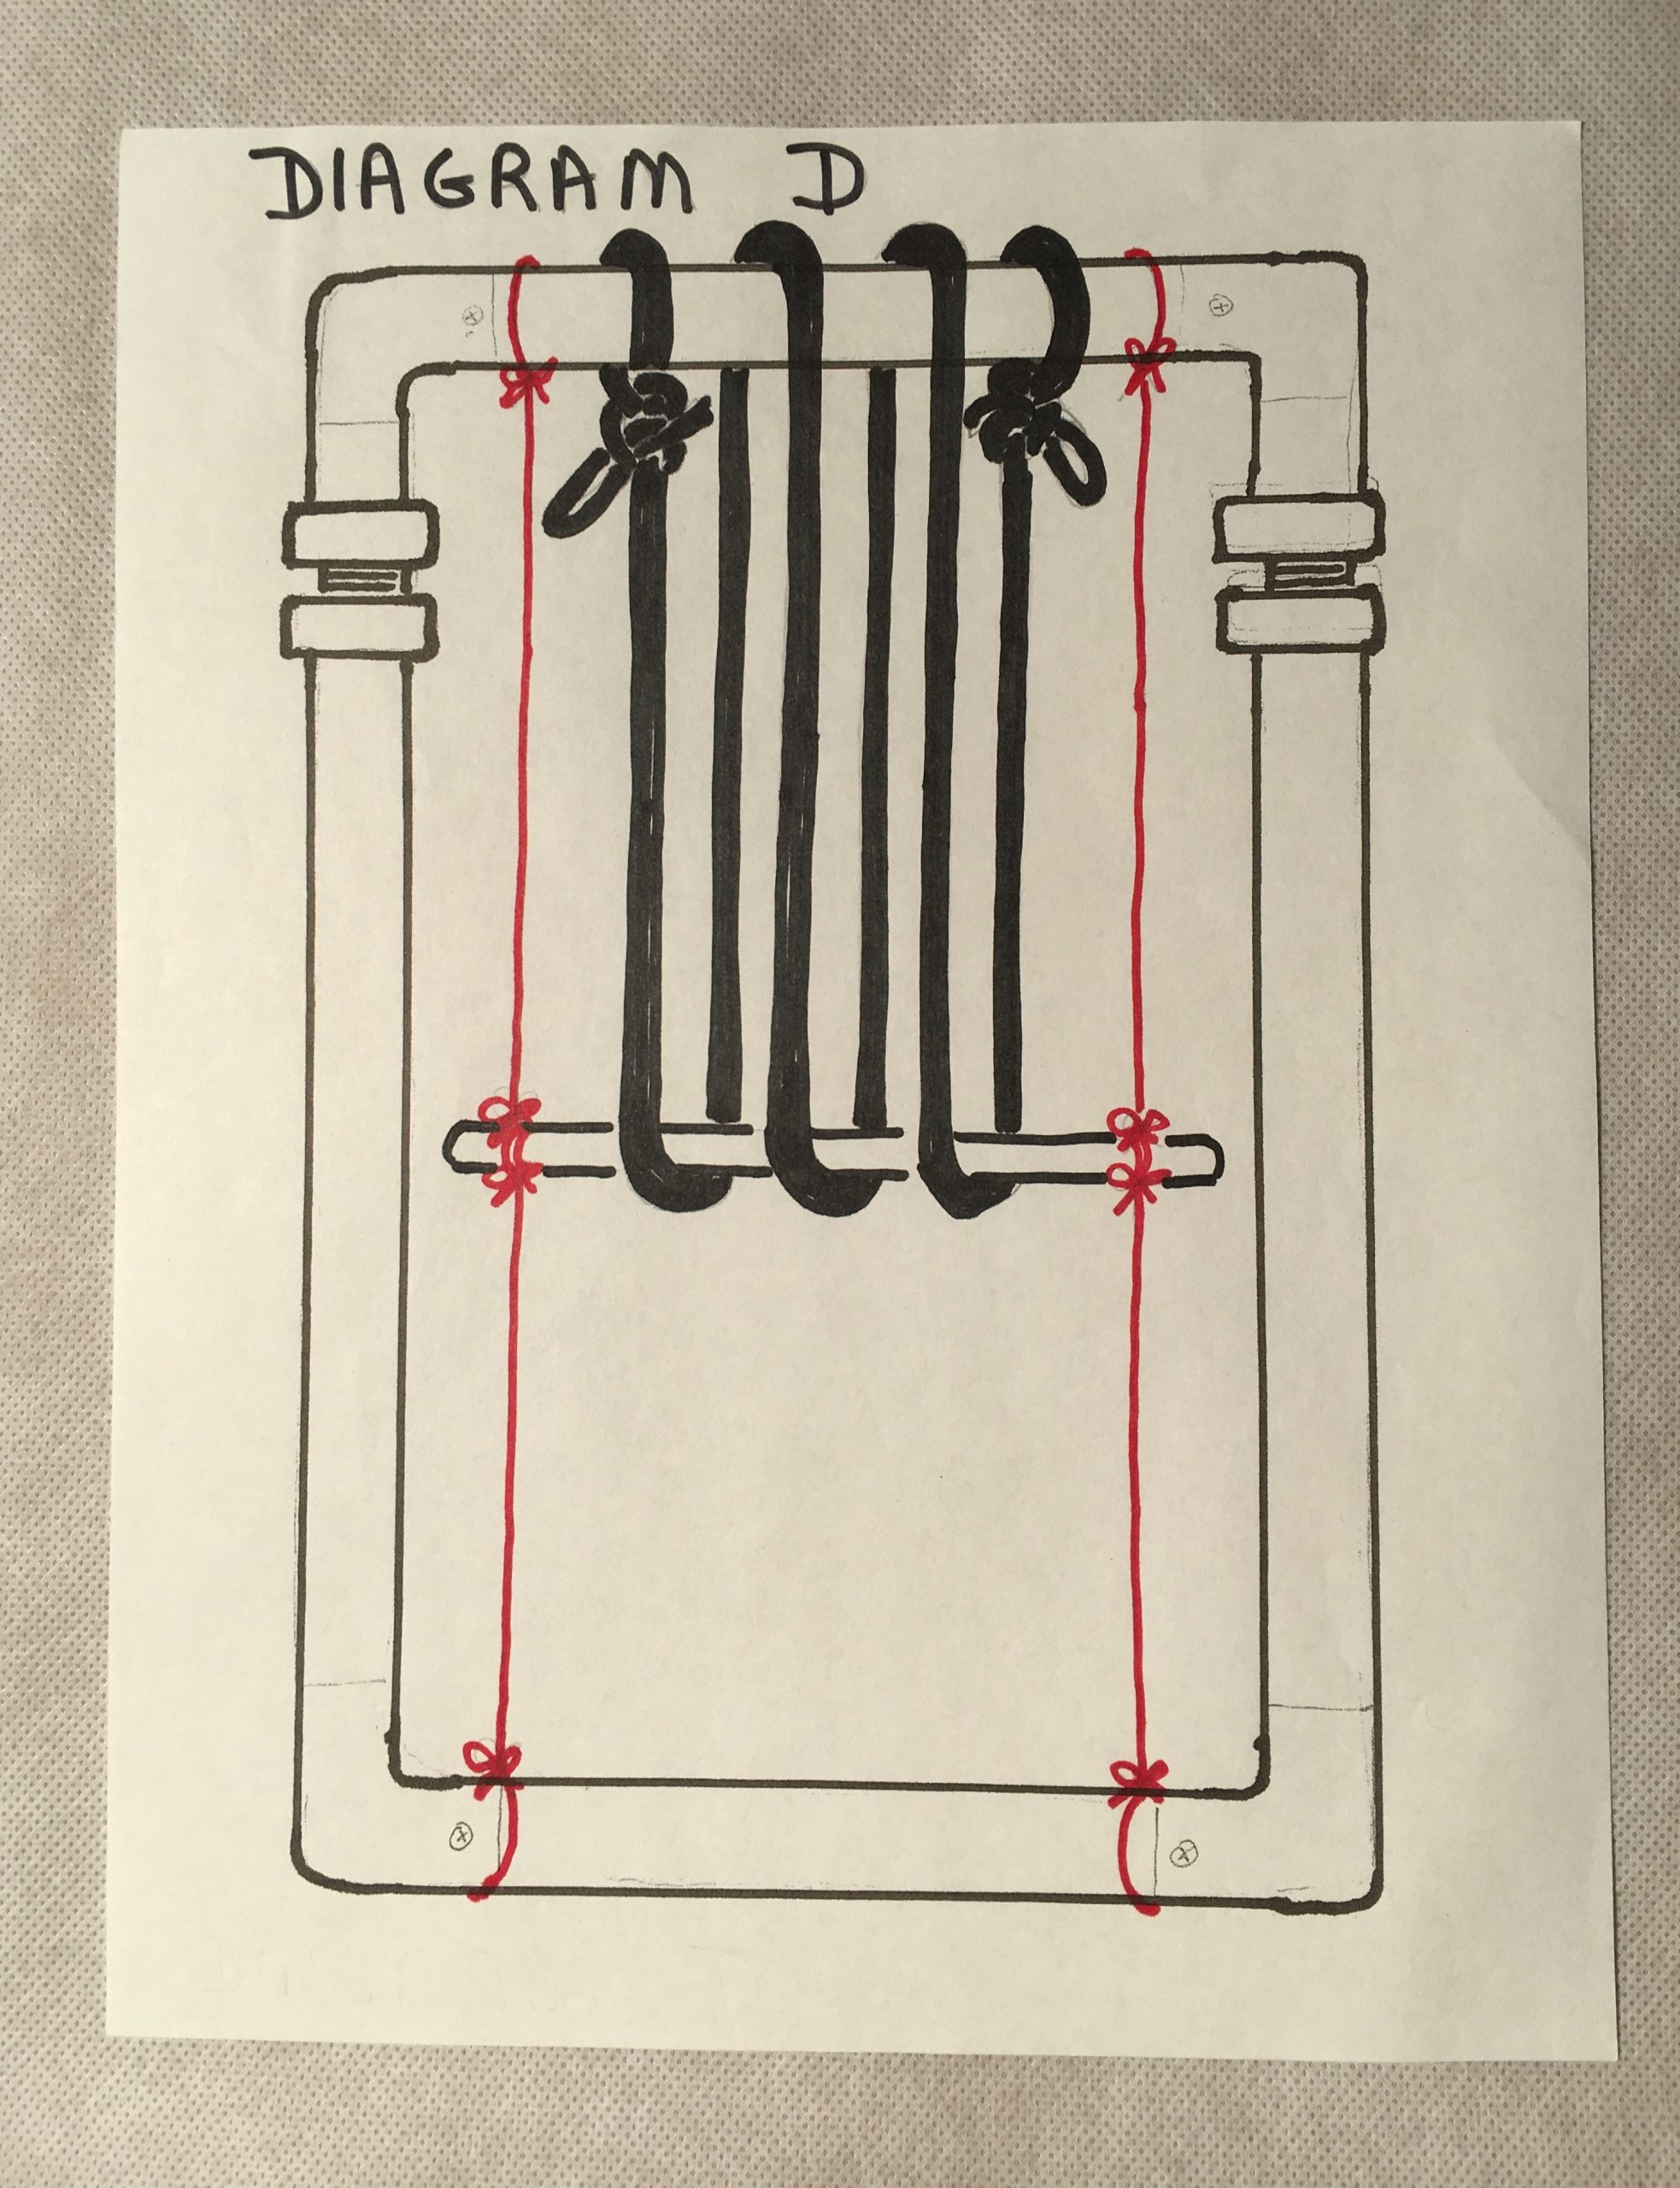
Tie the scaffolding bar very tightly in place (the desired height of weaving should be the distance between the bottom of the scaffold bar and the top of bottom beam of loom). I use two strong warp threads to tie the scaffold to the top of loom and then to the bottom of loom, as the pressure will in be in different directions as the warping is continued. Use a half hitch so tension can be easily adjusted (diagram A). Then put on the supplemental warp (diagram D), which is the warp that will allow you to have a shed all the way to the top of the loom. This should be a minimum length of 15” or more. The supplemental warp can be heavier than the warp for the tapestry as it is also used it as a spacer between the loops.
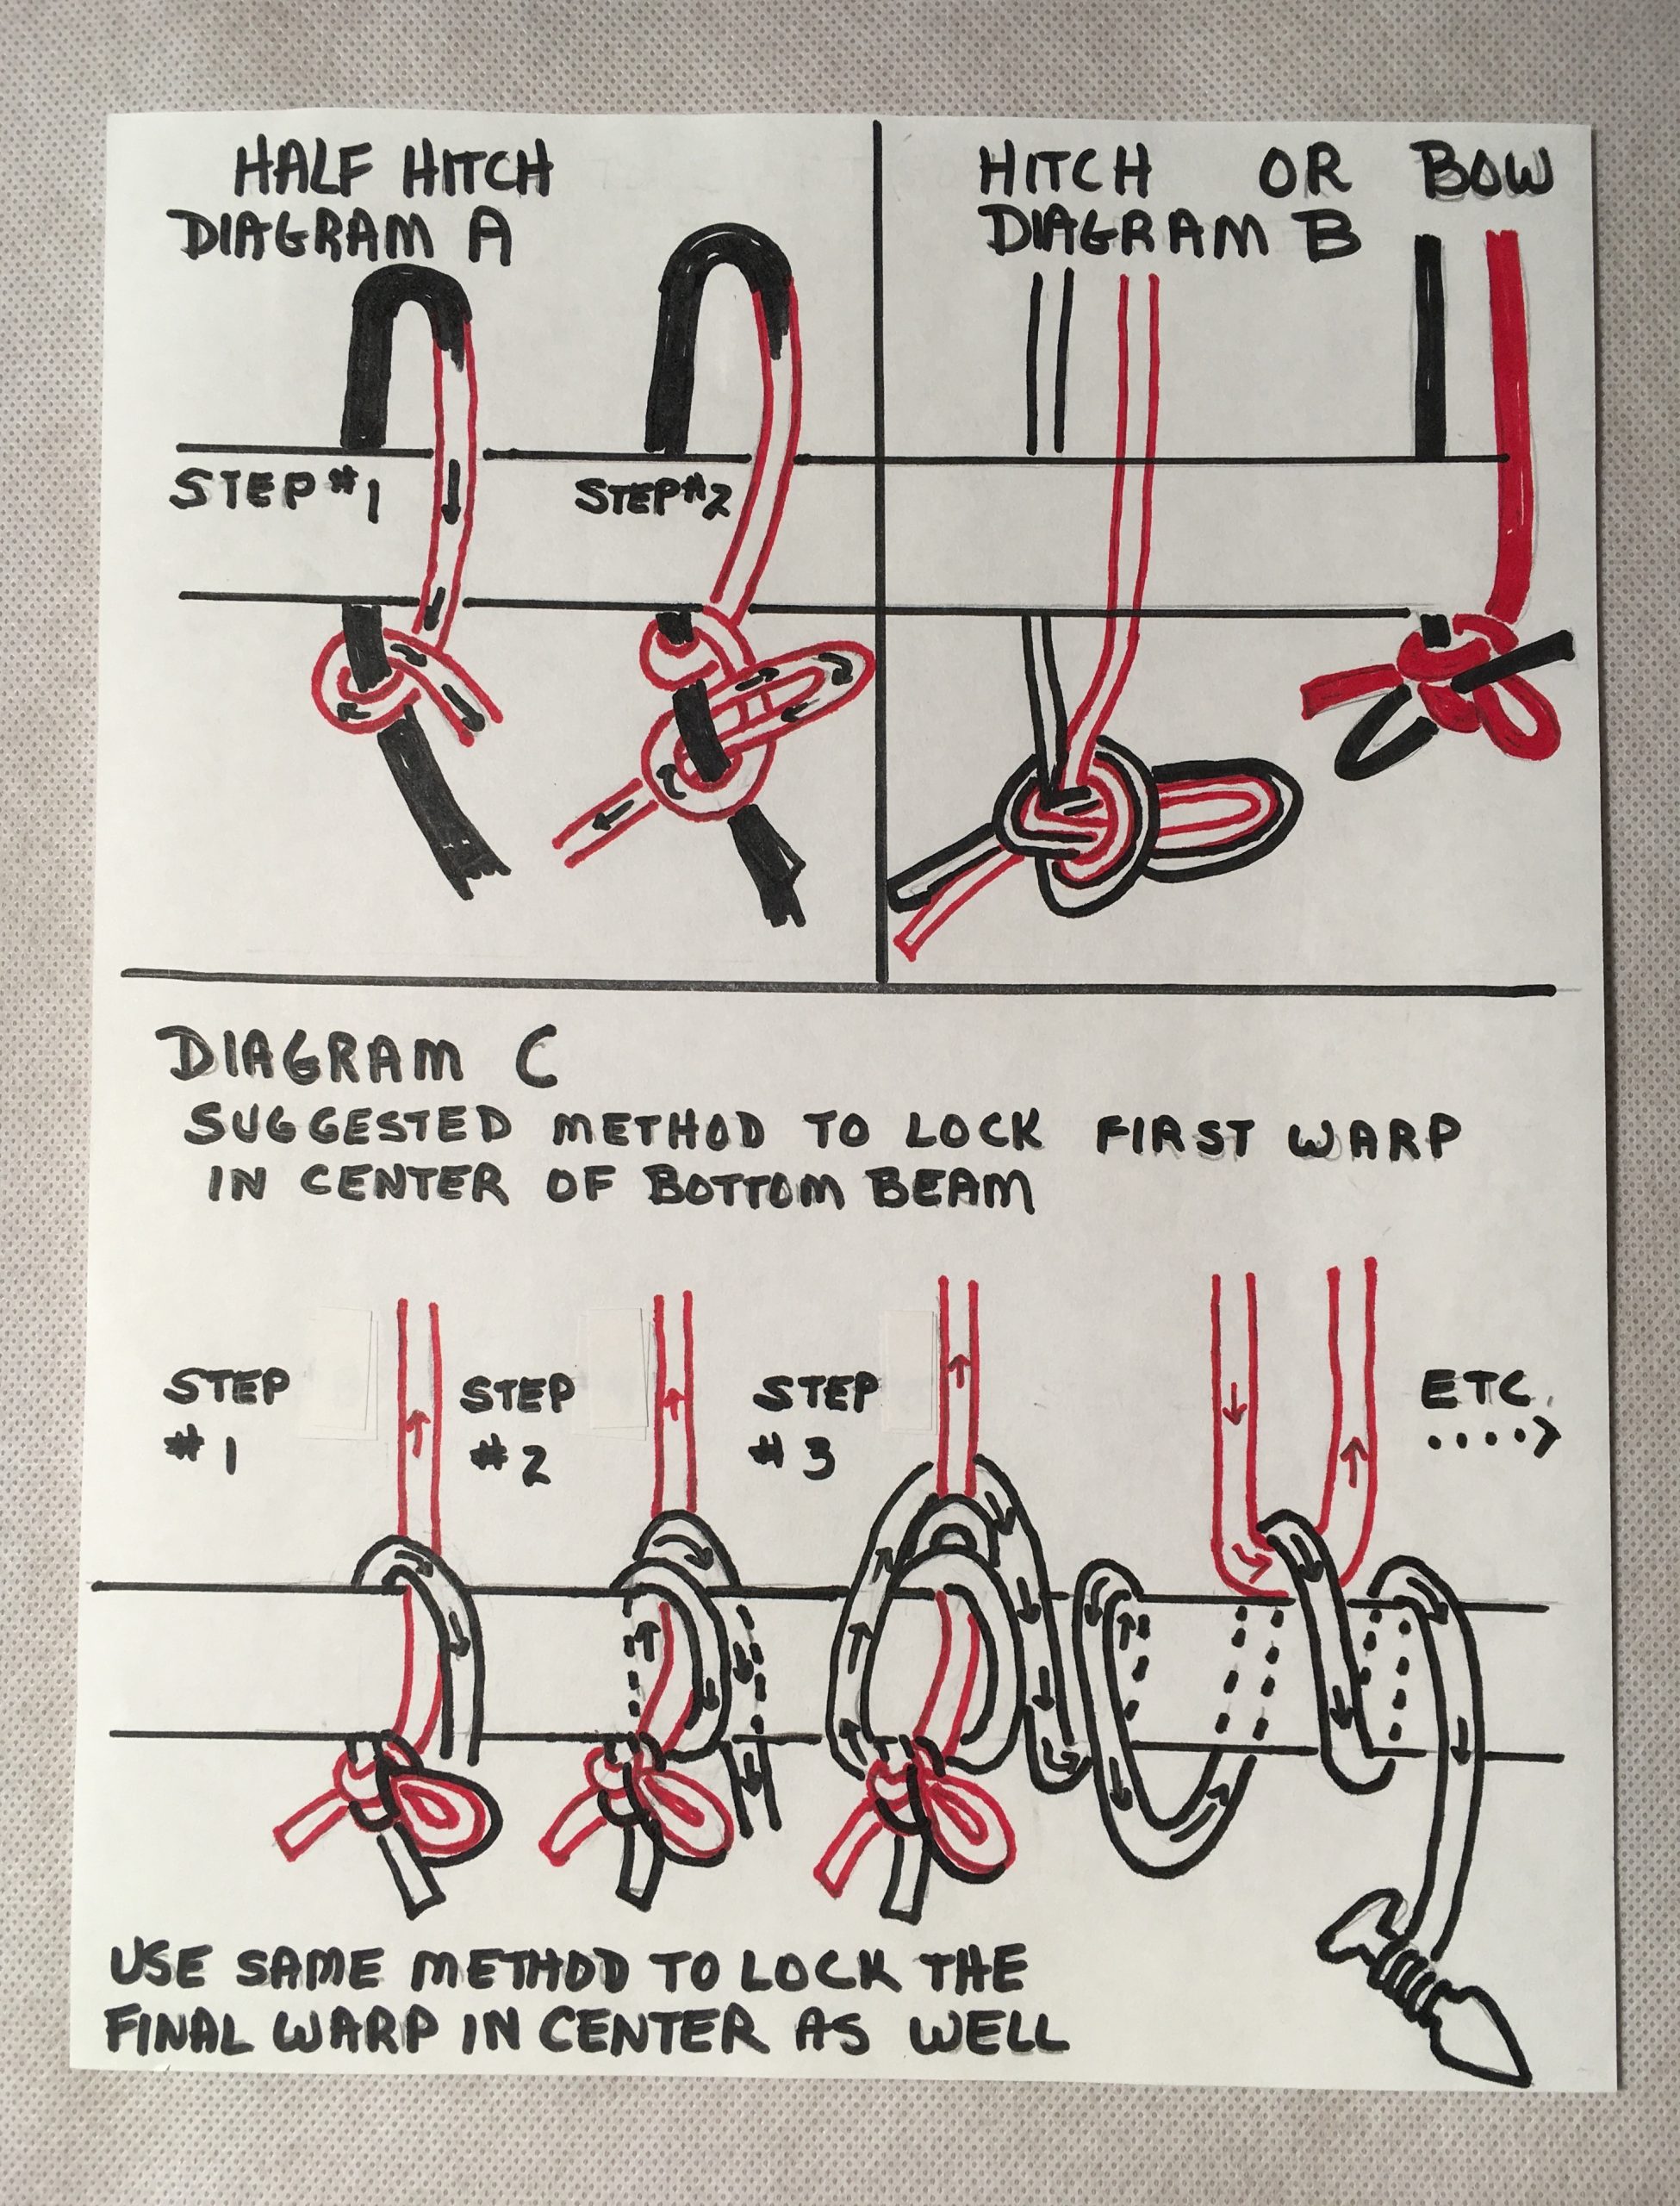
Attach the warp for the tapestry to the bottom of the supplemental wrapping warp with a removable knot (diagram B). Place the supplemental warp to the back of the beam and the weaving warp to the front. To lock these in the proper location proceed as in diagram E. This will center the first weaving warp on the bottom beam and make it easier to start the weaving. You will be putting on the weaving warp and interlocking it with the supplemental warp at the top and then with the wrapping warp at the bottom. On the bottom, extra wraps are required to make the spacing. Finish the warp by locking it in the same manner as you began (diagram E).

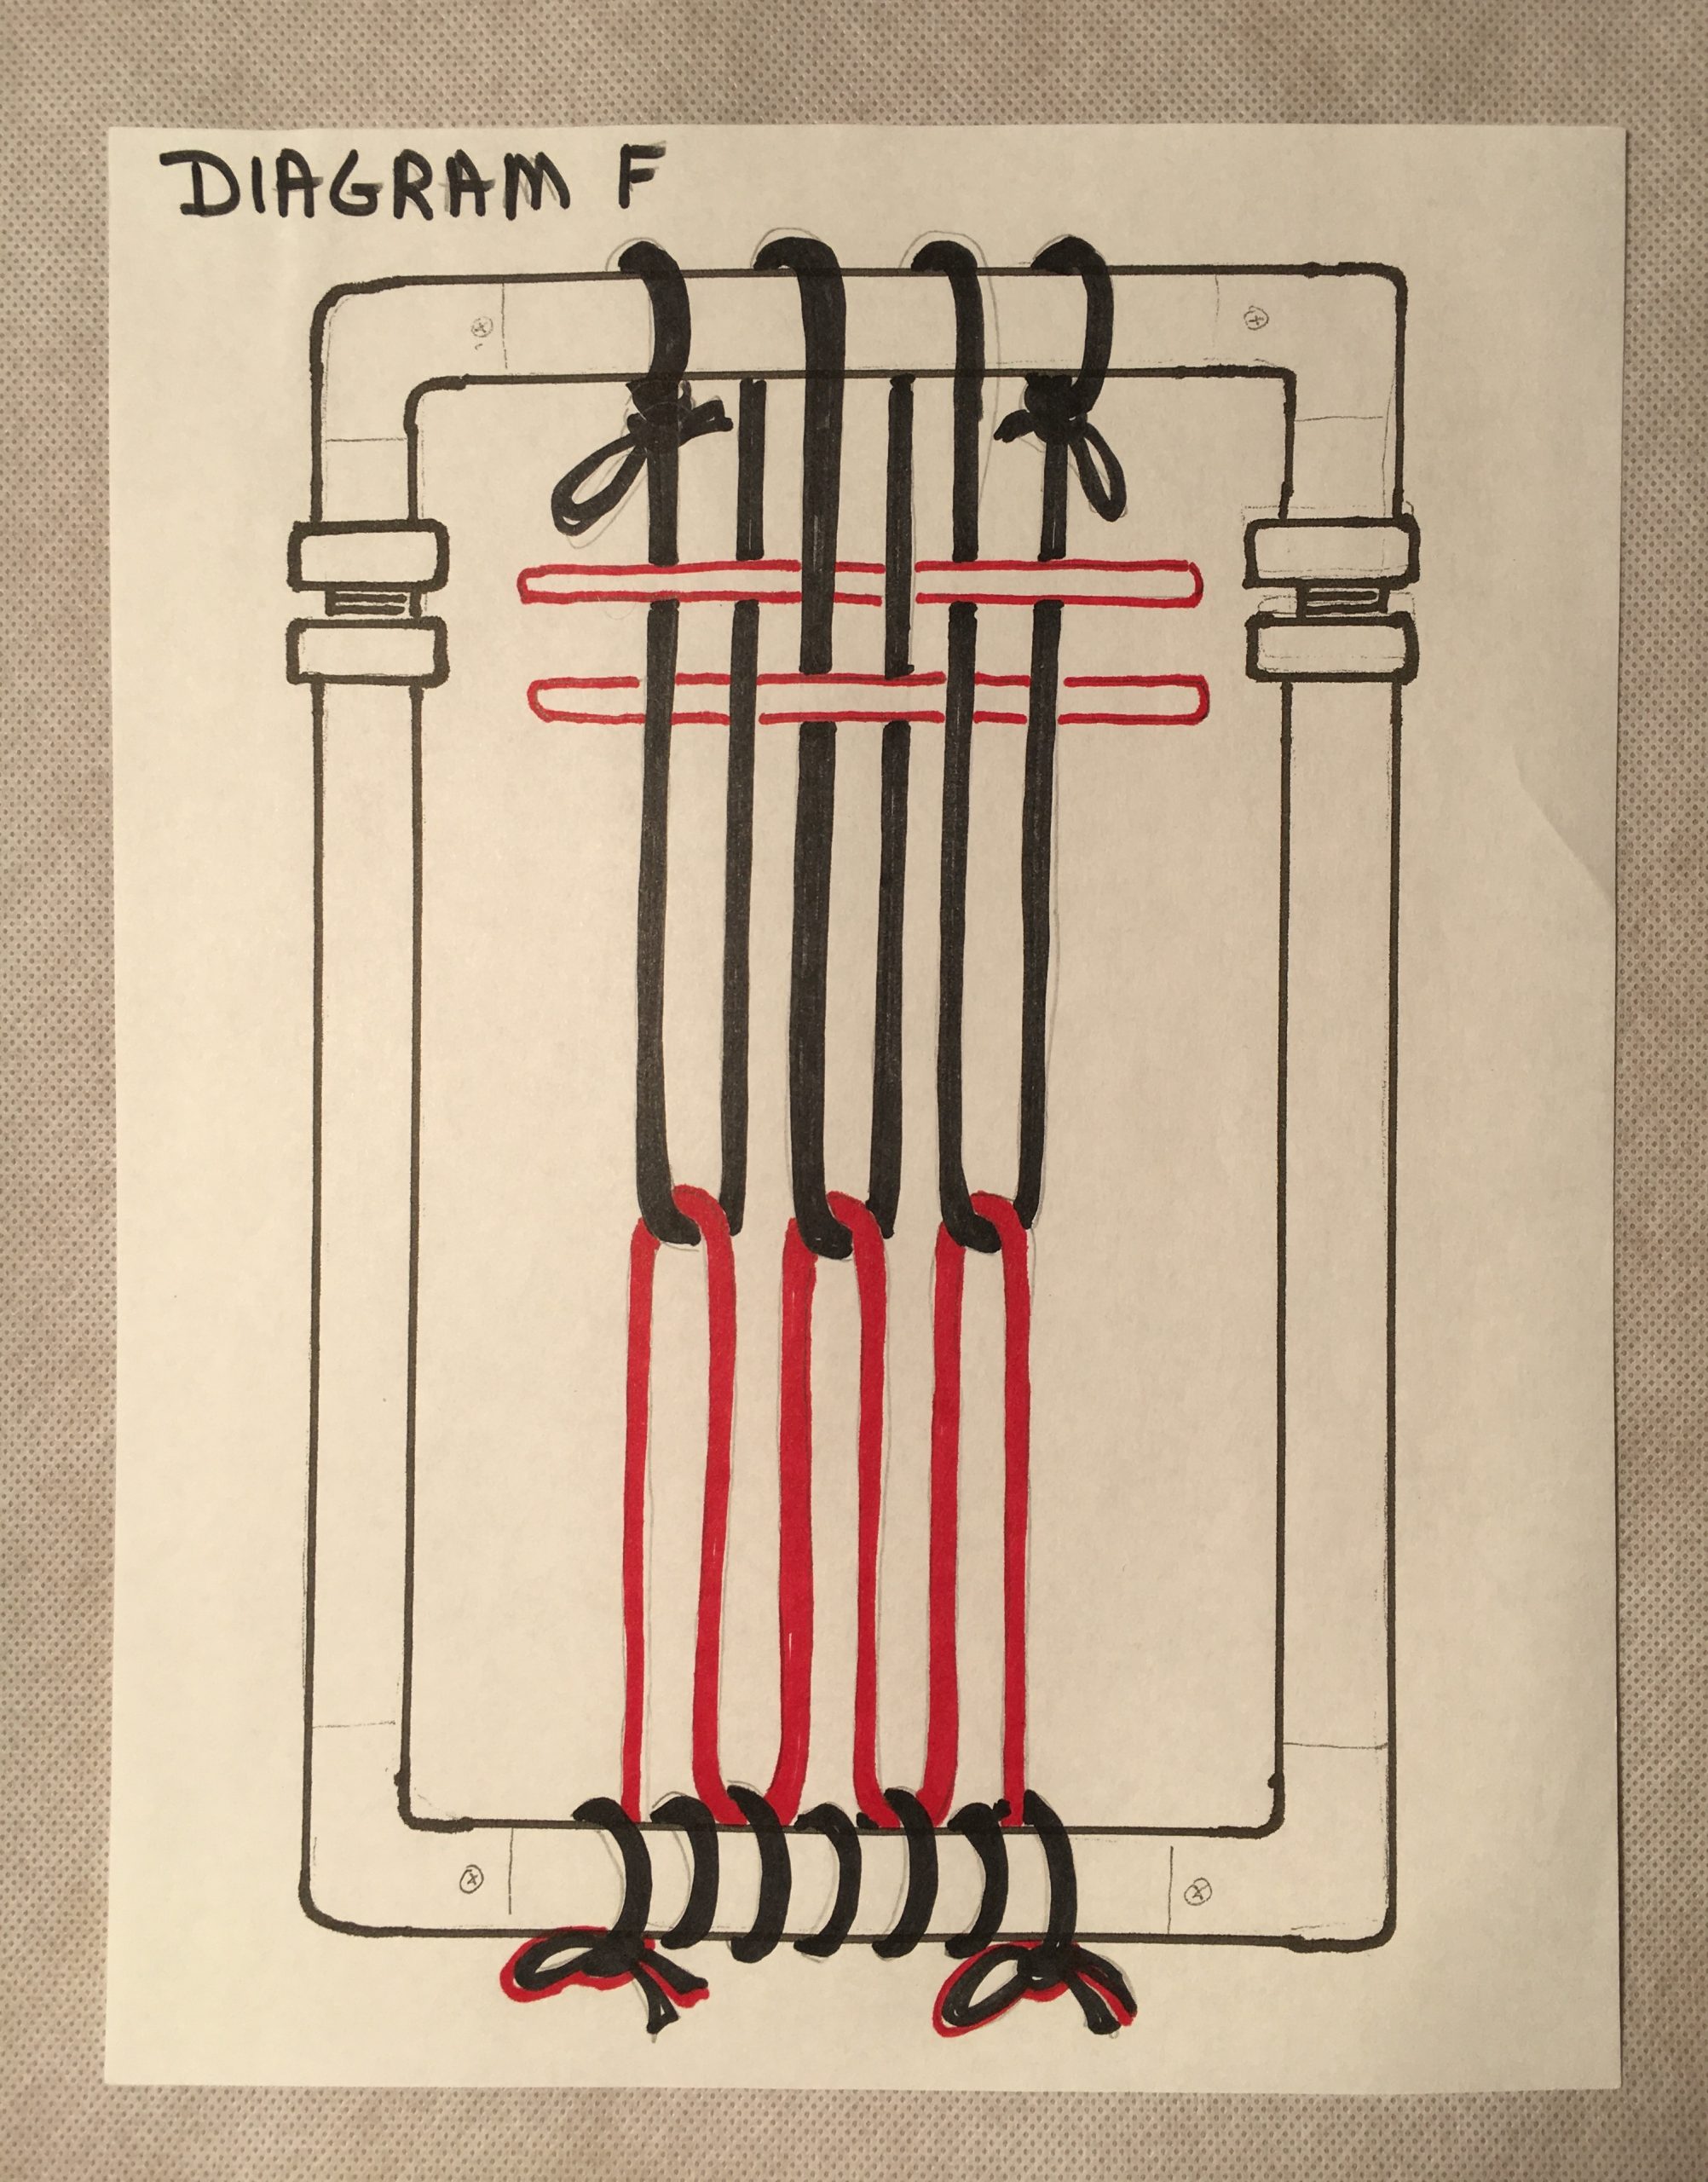
Remove scaffold bar after checking to ensure all three warps are connected to each other at all junctions. They should be connected under the scaffold bar and on top of the bottom beam. Now you must put in shed sticks using each connected loop as if they were one warp. You will need two shed sticks to maintain an even tension, and tension is the issue in this type of arrangement. (Diagram F)
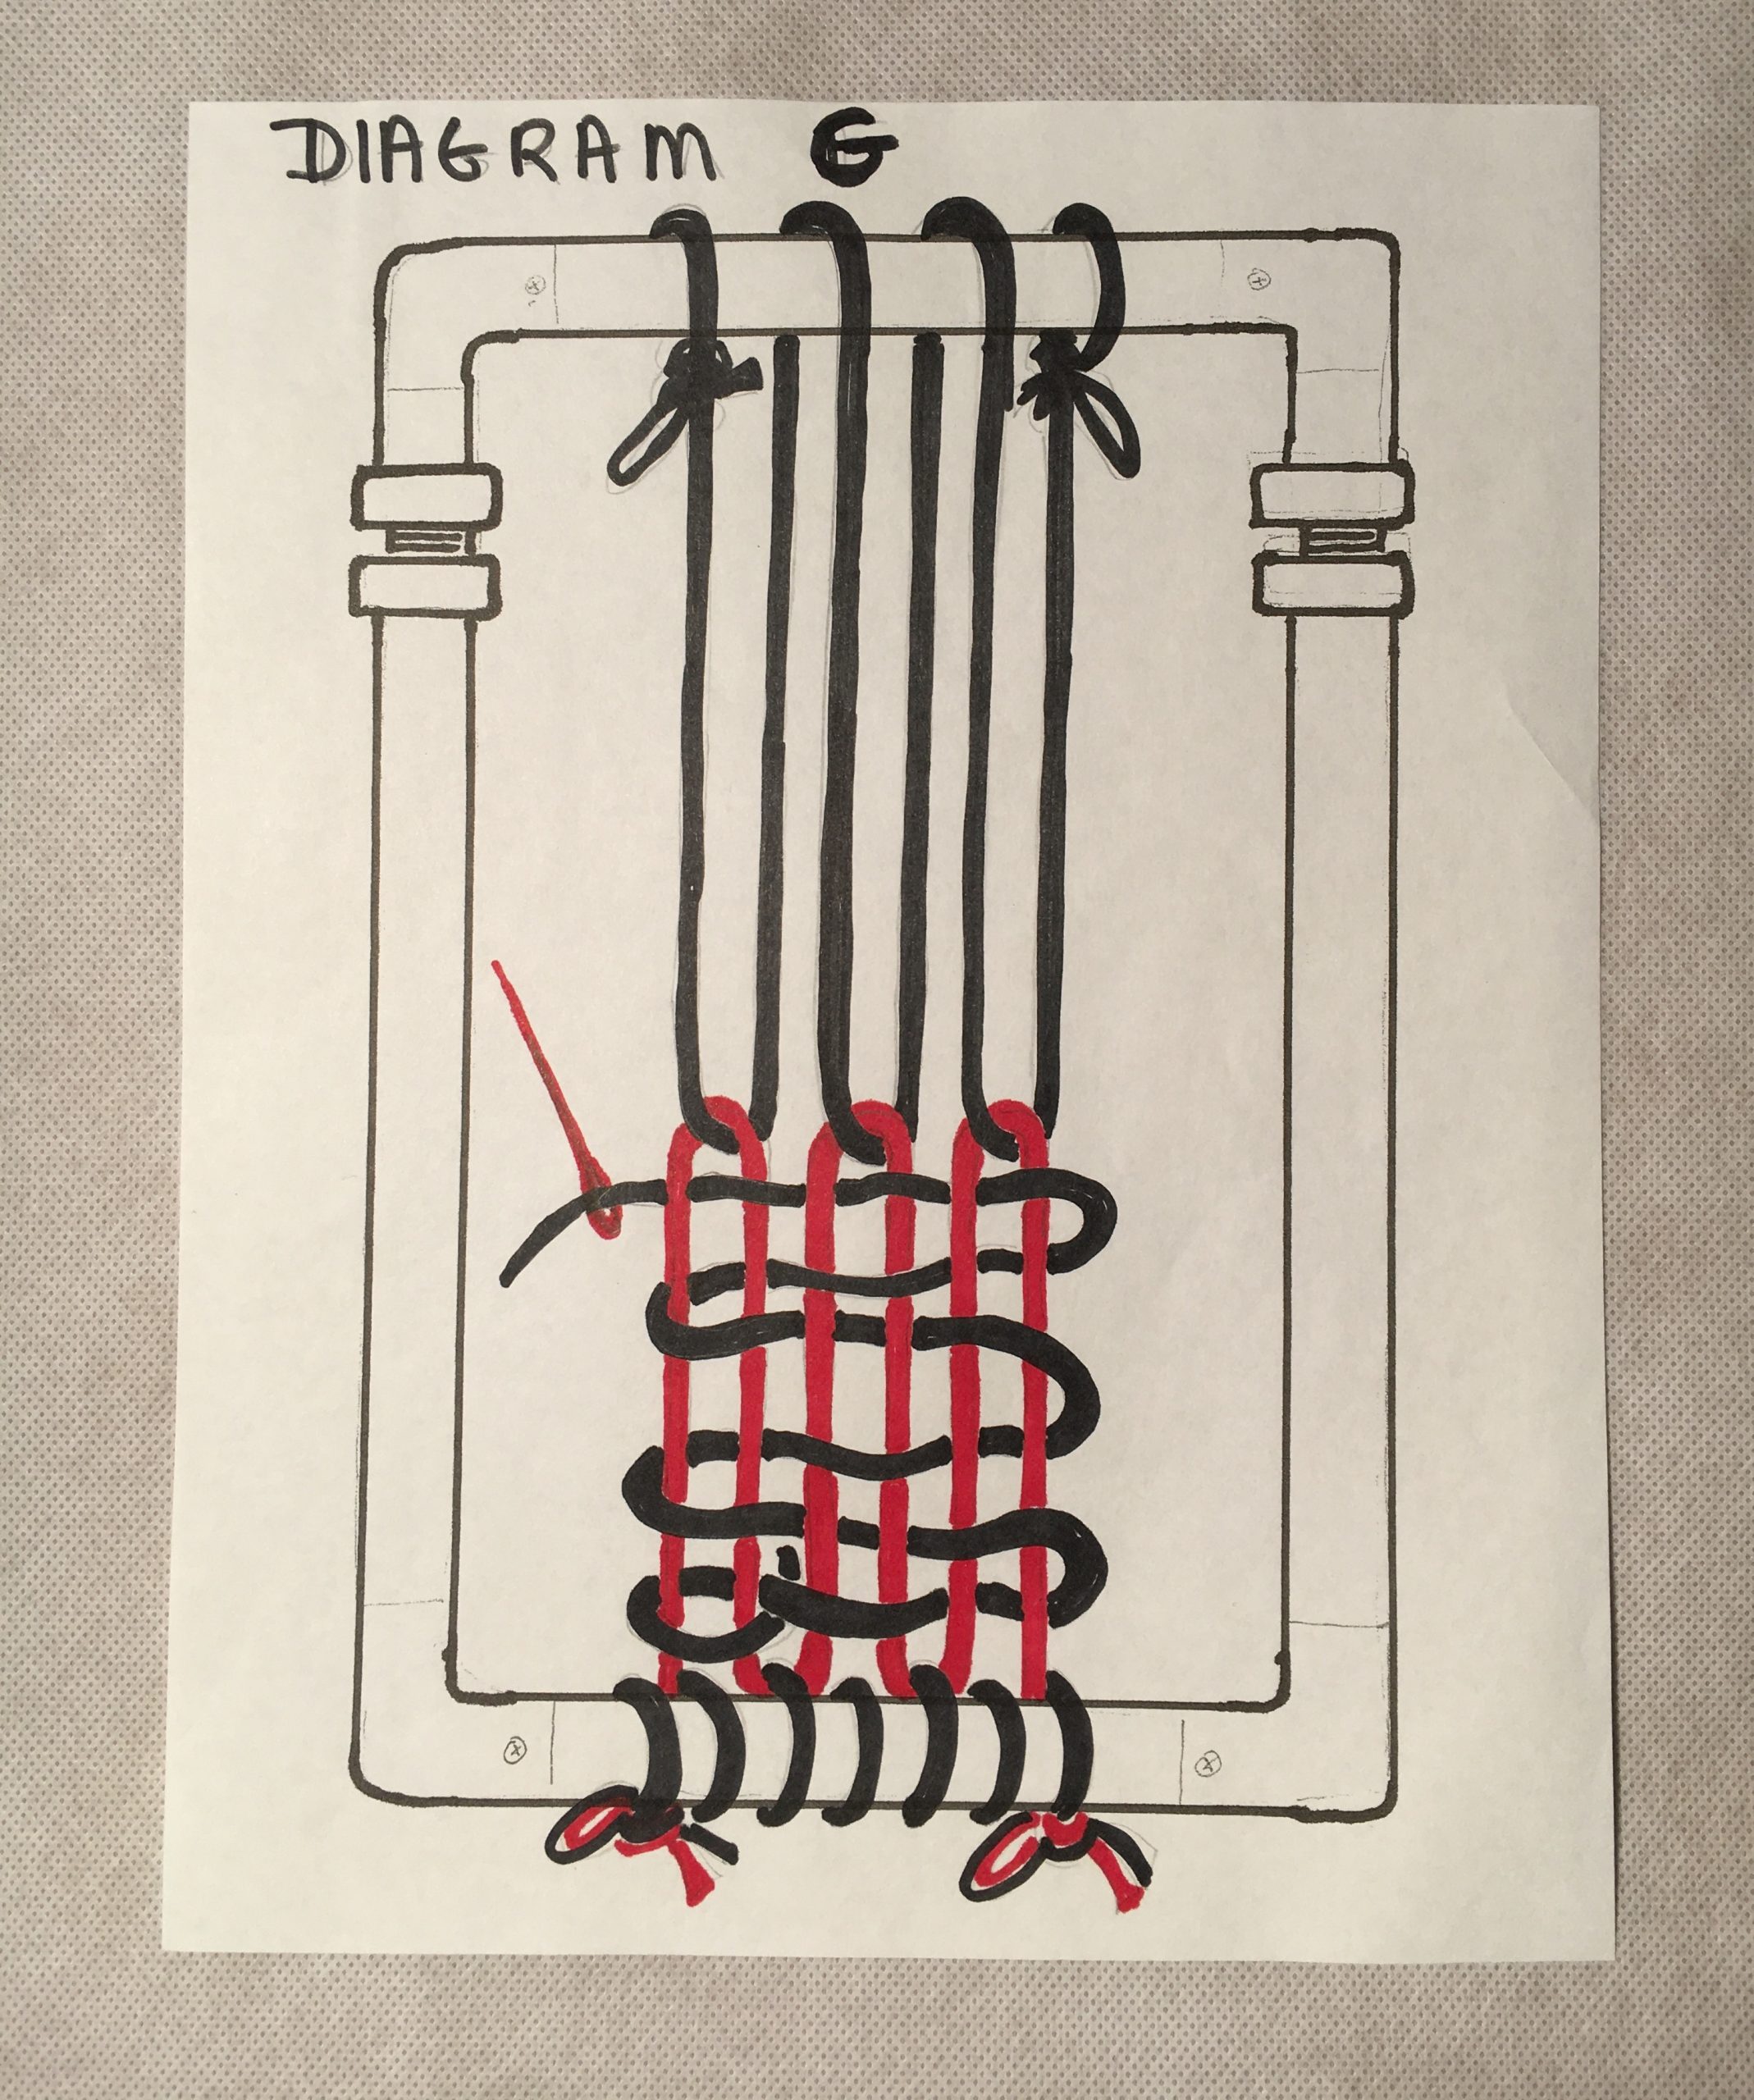
Begin weaving. If the shed sticks are correct you will be weaving over 2, under 2, (or over one loop, under one loop) with the shed open all the way to the top of the loom. Continue to weave until you reach the spot where the loops meet – until when you press down very tightly on the weft only the very tip of the weaving warp loop shows. The final weft pass should be a finer weft (but strong). With a needle, pass it through the top of the loops of the weaving warp. (Diagram G). I often use a fine strong linen thread for this final weft through the loops.
Untie the knot used to connect the bottom supplemental warp to the tapestry’s warp (both beginning and end warps). These warps of the weaving will be threaded back into the work after removal. Do not cut them!
Now you may cut off the top and bottom supplemental warps just an inch or so from the actual finished tapestry (remember not to cut thru the first and last warp). Pull out the supplemental loops from the weaving and needle weave the first and last warp and the end of the last weft(s) into adjacent spaces. (You can remove the supplemental warp without cutting it – if you have enough patience – and reuse it.)
Please note that the control of tension in the use of this technique is crucial and it is recommended that you start with a small weaving, perhaps bookmark size, and progress up in size slowly until you have become accustomed to dealing with the fact that if you pull too hard on one warp, because all warp are connected, it can throw off the evenness of the top connecting loops.
Also note that although we are using a warp doubled you cannot just cut the warp sett in half. For instance, if you are using a warp that is good for 12 e.p.i. and double it, you would think that it is a 6 e.p.i. sett. But in fact it will be more like an 8 e.p.i. because the warps will twist on themselves and sometimes lie behind each other, causing a greater space inbetween. Ideally you want the space between the warp to be just a bit bigger than the warp itself for a traditional sett.
Happy warping and weaving!